|
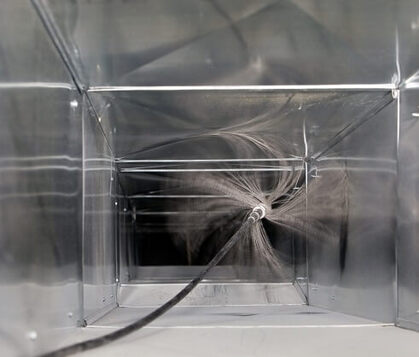
In preparation for winter, as you inventory your supply of hats and gloves, you may also want to take stock of your HVAC system—especially your furnace. Not only are HVAC system interruptions costly, but during the wrong season they can be extremely uncomfortable, even dangerous. Because you're going to be relying heavily on your HVAC system to keep you comfortable and safe this winter, it's a good idea to have all of its components cleaned and checked beforehand. Furnace Cleaning Your furnace is one of the most expensive and valuable appliances in your home. Before you call it into service for 6 months straight, do the right thing and have your furnace cleaned and checked. Even something as seemingly minor as a faulty flame sensor or ignitor can stop it cold. Further, your furnace works more efficiently when it's cleaned of debris that hinders air flow, so do your wallet a favor and have it serviced before the winter marathon. If you're one of those reactive personality types who thinks about your furnace only when it's not performing as expected, try being proactive this year! Air Duct Cleaning The transition from cooling to heating (or vice versa) is a good time to consider HVAC system cleaning. A lot of dirt and contaminants build up in your air ducts over time. This accumulation of debris recirculates throughout the system—through the return vents to the furnace and A-coil, then back into your living space via the supply vents. Before you close up your house for 6 months, make your lungs happy and have your air ducts cleaned of all of the debris within, to keep your indoor air as clean as it can be Chimney Sweeping The recommendation on frequency for chimney sweeping is approximately every 50 fires. Do you know how many fires you've lit since the last time your chimney was cleaned? Most people don't. Embarking on a season of heavy usage, best practice would be to have it cleaned beforehand to avoid the danger of a chimney fire due to excessive creosote buildup. By having your chimney swept in the early fall, you'll also conveniently avoid the pre-holiday rush that inundates chimney sweeps from mid-October to late December. Also, having the service performed before the snow falls will still allow for the technician to climb your roof if necessary. It is a rare technician who would agree to climb an ice-slicked roof, and you may in that case have to delay the service until spring. Dryer Vent Cleaning
Though not technically part of your HVAC system, the dryer vent line often gets lumped in with it because they both include ducts and vents, and the tools used to clean dryer vents and air ducts are similar. A buildup of lint in the dryer vent system is an extreme fire hazard, so consider having your dryer vent cleaned when you clean the various components of your HVAC system. In the case where your dryer vents onto the roof, you'll want to ensure you request the service before the snow falls, when your roof is still safe to climb. Add a "multiple services discount" into the mix, and you should have all the incentive you need to group your services together in the fall. Multiple Services Discount Many companies offer a multiple services discount as an incentive for customers to consider additional services--the company's savings on travel time and fuel is given back to the customer as a discount. (Twin Cities Furnace Cleaning offers $30 off every additional service performed on the same visit.) If you have 4 services performed, this could save you almost $100. So grouping all of your HVAC services together on one visit not only eases the task of remembering how long ago/how often you had each of them done, but it can save you quite a bit of money as well. Want to learn more about our HVAC services? Our service pages contain detailed descriptions about the tools and processes each service entails. Visit HVAC Services Page Many thanks to our technicians Ben S and Nick M for lending their expertise to this article.
0 Comments
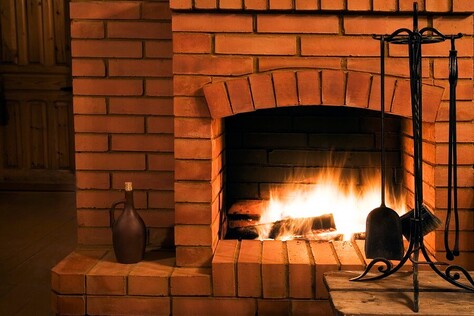
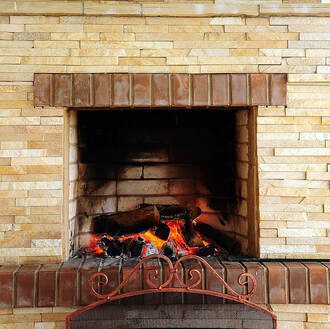
As the season for sitting by the fireplace nears, chimney sweeping finds its way onto the to-do list of many Minnesota homeowners. In the run-up to the holidays, as people prepare their homes for festivities and to receive guests, getting the chimney swept is unfortunately often a last-minute addition to the list of preparations. Why the rush? The seasonal nature of chimney sweeping means a flurry of activity during peak months (October through December) and little to none off-season, during warmer weather. Savvy homeowners and early birds will take advantage of this respite to have their chimney cleaned before the rush begins—when prices may increase and appointments are harder to come by. Some of the reasons for chimney sweeping include the following:
The above reasons for having your chimney swept become amplified during the colder months. Let's break each of these down. Removing creosote buildupCreosote buildup is detrimental to your chimney year-round, even in the warmer months when you're not using it, as it slowly corrodes the walls of your chimney. But the real danger comes during the colder months when you light a fire and risk that combustible buildup igniting and starting a dangerous chimney fire that can quickly spread to the rest of your home. This is the number one reason to have your chimney swept, especially just before the season starts. Installing a chimney capChimney caps serve many purposes, including to keep rain, snow, and debris from entering your fireplace flue, to keep animals out, and to prevent water from pooling at the seam of the crown and the flue tile, where trapped water freezes and expands, wreaking havoc. Though animals can enter an unprotected chimney year-round, they are more likely to do so when the weather becomes cold. Additionally, you'll definitely want to have a cap in place before the freeze-thaw cycle begins, to avoid cracks due to water pooling around the perimeter of your flue tile. Clearing blockagesAny blockages from nesting animals will necessarily be cleared by a chimney sweep. Though these blockages may be a mere nuisance in the warmer months, with animal young (and parents) inhabiting your flue and the cacophony and stench that their presence entails, it is not inherently dangerous until the colder months come around and you light a fire, risking major damage with all of that combustible material inside. Before the season starts, eliminate the risk of a small forest fire in your chimney and have that debris cleared Checking for disrepairOver time the wear and tear on a chimney and exposure to the elements causes slow deterioration of the masonry. Once cracks and chips have begun to form, water finds its way more easily into those weakened areas and into the flue itself. Cracked crowns, spalling bricks, holes in the liner—all of these issues become worse after the freeze-thaw cycle, when water enters compromised areas and expands as temperatures drop, then recedes as temps warm, causing further damage. Pinpointing and addressing these compromised areas with prompt repairs before the snow falls will help your chimney weather the cold months. Checking the "other" fluesBesides your fireplace flue, there are other flues in your home that need regular checking, such as utility flues—those that vent your furnace and water heater. If these are uncapped and clogged with debris, the dangerous fumes that under normal circumstances exhaust via these channels to the outside of your home can end up backing up into your living space. Before animals begin seeking warmth within, have a technician check that all blockages are cleared and a cap is securely in place.
For all the reasons there are to have your chimney swept and inspected regularly, there are even more to have it done before the onset of winter's cold. Why not go ahead and schedule your service now? Our office staff are quick to answer the phones, and our online booking widget stands ever-ready to receive your appointment, at your convenience. Book Now Want to learn more? Download our free tipheet: 5 Questions to Ask Before Hiring a Chimney Cleaning Company. Download Tipsheet Regular chimney sweeping is a critical aspect of chimney maintenance. It improves air flow and increases draft so that smoke can be drawn upward and out of your home. But more importantly, sweeping, by removing the buildup of flammable creosote, reduces the risk of a dangerous chimney fire. There are several things that you, as an engaged and invested homeowner, can do yourself to keep your chimney clean and to minimize blockages and buildup in the first place. Put a cap on it!
The single most important and easiest thing you can do to prevent blockage of your flue and protect the health of your chimney is to put a cap on it. A chimney cap fits over the top of your flue, typically with a solid top and screened sides, allowing smoke to escape but preventing the entry of snow and rain, plant debris, and most importantly, nesting animals. Available in a variety of materials (stainless steel, copper, galvanized) and for every size of flue, chimney caps are cheap and easy to place (once you're on the roof, that is). There's simply no reason not to take this minimal step in protecting your chimney. Burn the right type of wood While we're talking prevention, the wood you're using for fuel definitely matters when it comes to the health of your chimney. Hardwoods (e.g. oak, maple, birch) burn hotter than softwoods (conifers) and thus produce less ash and less chimney-clogging creosote. Additionally, burning wood should be well-seasoned—that is, dried--for at least a year but ideally two or three years. Another best practice for preventing buildup is to keep the fire burning hot and not allowing it to smolder and smoke. Smoke is what turns to creosote and coats the inside of your chimney: the less smoke, the less buildup, the less often cleanings are needed. Brush the flue Dedicated DIYers can find various chimney cleaning brushes and tools online. You'll want to find a brush that matches your chimney flue in shape and size—too small and it will just bang around inside without accomplishing much of the scraping that needs to happen for creosote removal; too big and you make your job more laborious and risk damage to the liner or flue, or it could get stuck and break. A chimney can be swept from the roof (top-down method) or from the firebox (bottom-up method), each with its own set of challenges. You'll want to close off the firebox from the living space if you're working from the top down, and if working from the bottom up, prevent debris from entering your home with the help of a powerful vacuum or a plastic sheet placed across the fireplace with a flap for access. Clean the firebox After brushing the flue, the creosote chunks and ashes will fall into the firebox. To remove, you can begin with the fireplace broom and dust pan for larger debris, and a dust extractor or shop vac for the finer dust (spare your household vacuum from this dirty job). A cloth moistened with water will also work fine to collect the finer debris and finish the job. Note that the CSIA (Chimney Safety Institute of America) recommends that unless it's the end of the fire season, about an inch of ash should remain in the fireplace, both to protect the bottom of the firebox and to help maintain the next fire. Where the pros come in Chimney sweeps have the expertise and specialized tools to effectively remove creosote buildup and any blockages from your chimney flue, and to preventively install or replace a chimney cap. Sometimes creosote levels or blockages are such that removal is best entrusted to a professional. Though creosote buildup in its early stages is powdery and fairly easily removable with appropriate brushing, later-stage creosote resembles a tarry glaze and is far more stubborn, requiring more specialized tools. Additionally, a chimney sweep's years of experience help them to diagnose and troubleshoot common chimney problems, such as backdrafting or unpleasant odors, and to check various removable parts, such as the damper and cap, to ensure good condition and functionality. They will look for signs of disrepair in the masonry, such as spalling brickor a cracked chimney crown, and recommend repair if necessary. No matter how well or how often your chimney is cleaned, you'll want to have it inspected initially, upon taking ownership of a new home, and then regularly thereafter so that any areas of disrepair can be identified and addressed before they become more significant and costly. In short, a savvy homeowner will take all necessary preventive measures to maintain the health of their chimney in between cleanings, bringing in a professional regularly to make sure the chimney is free from obstructions and deposits, that it's in good working order, and to check for any signs of disrepair or deterioration. Wanna dig deeper? Download our free tipsheet: 5 Questions to Ask Before Hiring a Chimney Cleaning Company. Download Tipsheet Many thanks to our technicians Roy S and Ben S for lending their expertise to this article. Thanks to fire safety campaigns and diligent dryer vent cleaning companies, awareness appears to be increasing regarding the hazards associated with a dirty dryer vent. Since your dryer vent serves as the exit for heated air from your dryer to the outside, any blockages or combustibles (think lint, animal nesting) can pose significant danger. Enterprising homeowners often want to tackle this task themselves. Here are some things you can do yourself, to the extent you choose, whether you take on the entire project or tackle a few tasks in between professional cleanings. Clean the outside vent
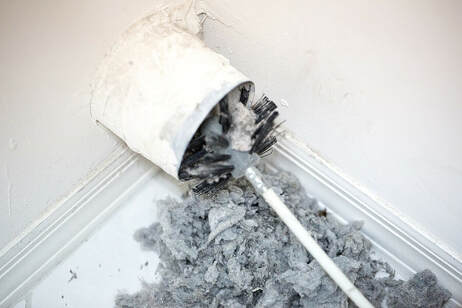
A properly installed dryer vent line begins at the machine itself and exhausts somewhere outside your home. The end of the vent line should be covered in such a way that allows air and lint to escape but prevents animals and debris from entering. Often this is in the form of a hooded vent cover with a damper or flap, or a louvered cover, that opens when hot air from the running dryer forces it open, and then falls back into a closed position by default. A dryer vent should never be covered with a screen, as this can create a fire hazard when lint collects over time in the holes of the screen. If yours has a screened cover, best practice would be to remove it and replace with an appropriate louvered or hooded cover. Large clumps of lint often congregate around the outside vent, at the mouth or just outside of it, on the hood, flap, etc. Remove the cover if possible, and use a brush or vacuum to remove as much lint as you can access. Use a dryer vent cleaning kit (at your own risk) Dryer vent cleaning kits are widely available in home improvement stores and across the internet. Mostly they consist of a set of flexible rods that screw together to create the needed length, and a few different brush heads to place at the end. They can be used from the beginning of the dryer vent line to the outside vent, or from the outside vent in (having disconnected the dryer from the vent line). The brush head rotates with the aid of an electric or cordless drill, and flexible rods are added on for length as the brush head moves deeper and deeper into the vent line. As easy as they sound, these kits have some limitations, as well as risks to the vent line, particularly breaking off inside, which can make retrieval very difficult and may necessitate disassembly of the vent line if the breakage occurs in a ceiling, wall cavity, or other inaccessible area. If it happens above a finished ceiling, for example, you may find yourself ripping out drywall to get to it. In sum, dryer vent cleaning brushes work best on very short, straight runs, in vent lines made of rigid metal. Although, if the line is short and straight enough, the entirety of it can perhaps more easily be disconnected, taken outside and cleaned, and then reassembled with heat foil tape. Where the pros come in If your dryer vent configuration is straightforward and you're willing to invest the time, DIY dryer vent cleaning can be successful. But there are many cases where you're better off forking over the hundred bucks or so for a professional cleaning and the peace of mind that comes with it. Many an HVAC technician has been called to a home after a DIY dryer vent cleaning fail. The most common problems resulting from DIY attempts are breakages of the rods or brush heads inside the vent line, puncturing of flexible duct, disconnecting of the vent line, and pushing all the debris to a specific spot (an elbow, for example) without being able to fully extract it, thereby creating a bigger and more dangerous clog. The advantage of hiring a professional? Besides technician experience and the versatility that comes from it, specialized tools are key. Most (but not all) dryer vent cleaning companies, rather than using a handheld drill and rods with a brush head, use an industrial air compressor to power a "skipper ball" via a flexible air line. The tech feeds a skipper ball attached to an air line from the outside vent all the way through the dryer duct to the back of the dryer. When the tool is engaged, it swiftly spins around and expels pressurized air from tiny holes on its surface. As the technician pulls the tool out, the spinning skipper ball blasts the lint out with it. Because the tool is connected to an air hose, instead of rods, there is almost zero risk of breakage. Because the skipper ball relies on air pressure and a spinning motion as opposed to rigid bristles and aggressive torque, there is little chance of disconnecting the vent line or puncturing it. Rooftop dryer vent cleaning adds another layer of complexity and risk familiar to HVAC technicians that many homeowners will want to avoid. Adequately informed and appropriately equipped, the motivated homeowner can significantly reduce the amount of lint contained in their dryer vent line. A professional can always be called in if things go south, or for those of us who may not be so motivated. Wanna dig deeper? Download our free tipsheet: 5 Questions to Ask Before Hiring a Dryer Vent Cleaning Company. Download Tipsheet Many thanks to our technician Ben S for lending his expertise to this article. |
SearchArchives
April 2022
|
Twin Cities Furnace Cleaning - Open 7 Days a Week 8AM to 8PM


